👤 Adding a New Profile

1️⃣ Select the Country 🌍
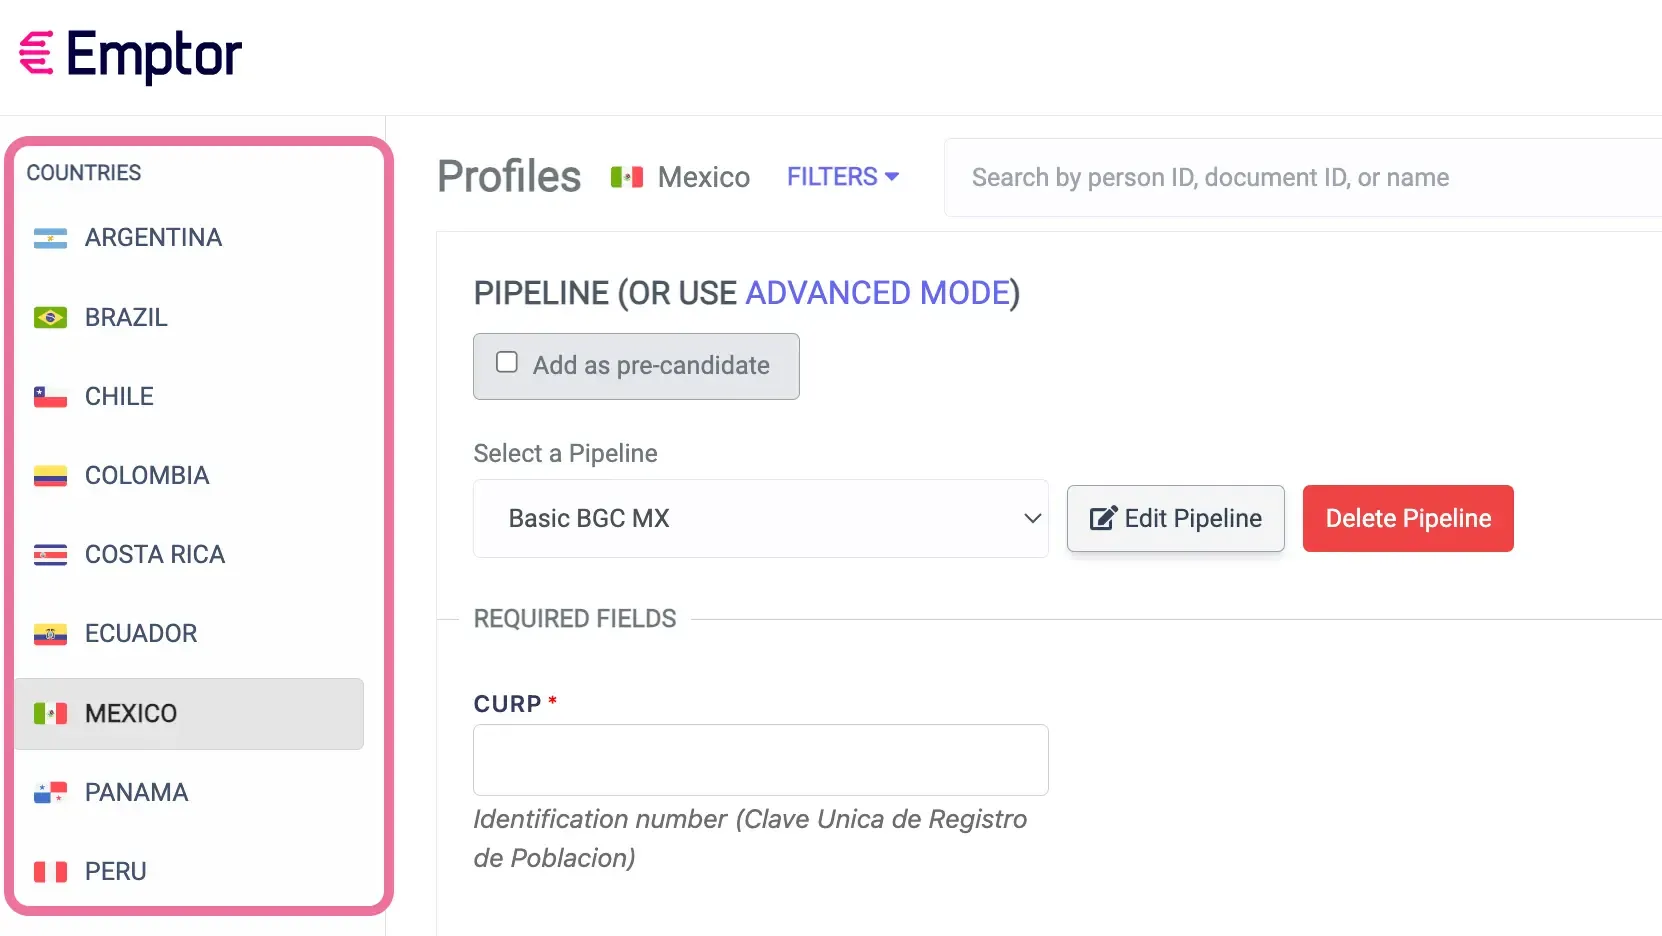
Section titled “1️⃣ Select the Country 🌍”Upon landing on the Emptor Dashboard, start by choosing the relevant country from the left sidebar list for your Background Check. This determines the verification types available.
2️⃣ Add a New Profile 👥
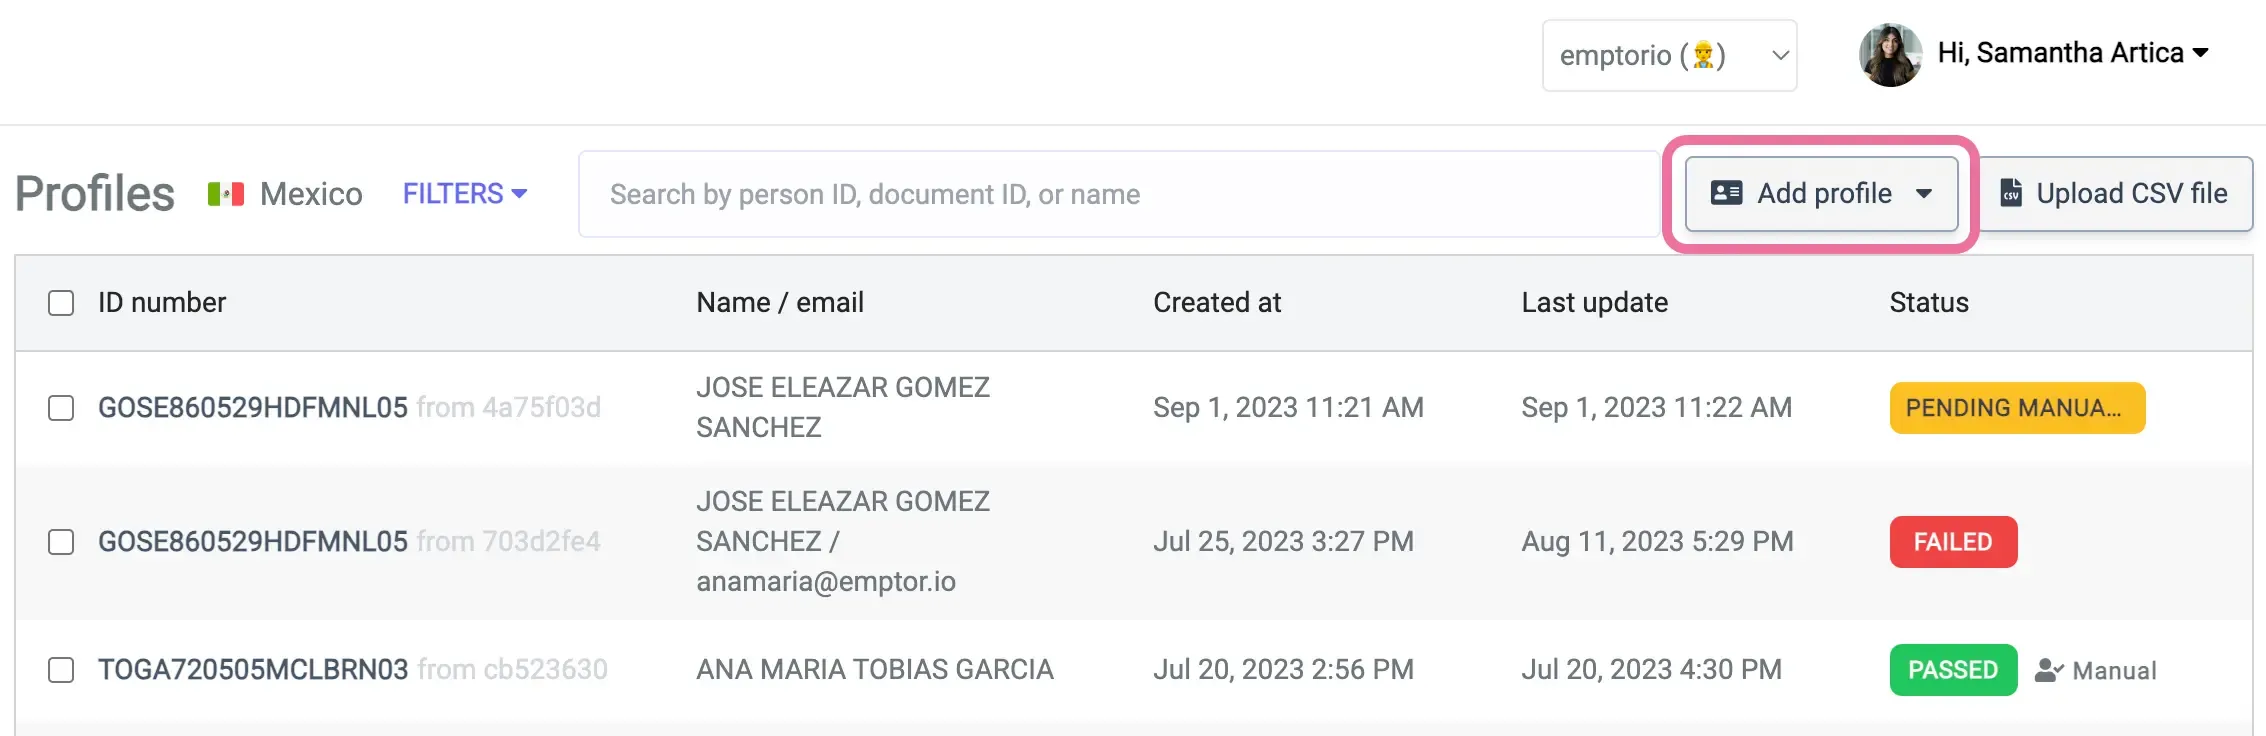
Section titled “2️⃣ Add a New Profile 👥”Spot the “Add Profile” button on the upper-right corner and click it.
3️⃣ Choose your verification method 🔍
Section titled “3️⃣ Choose your verification method 🔍”You have two options for selecting verification reports:
Option A: 🌐 Advanced Mode
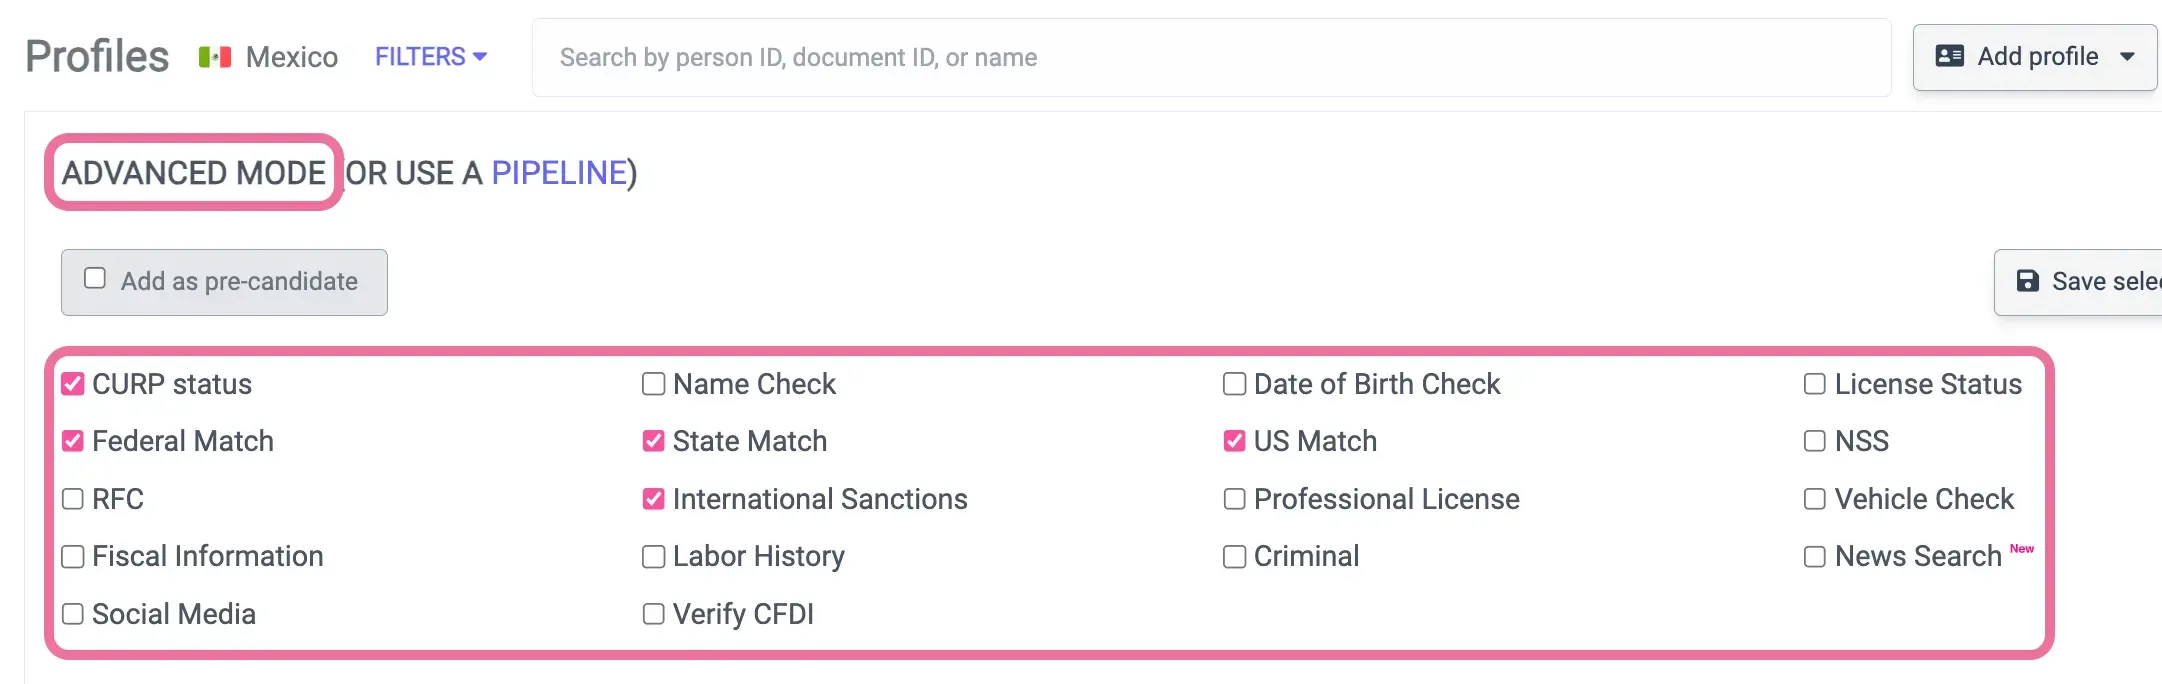
Section titled “Option A: 🌐 Advanced Mode”If you know exactly what you need, manually select the desired verification reports. Check here to see our available verification reports.
Option B: 💡 Verification Pipelines
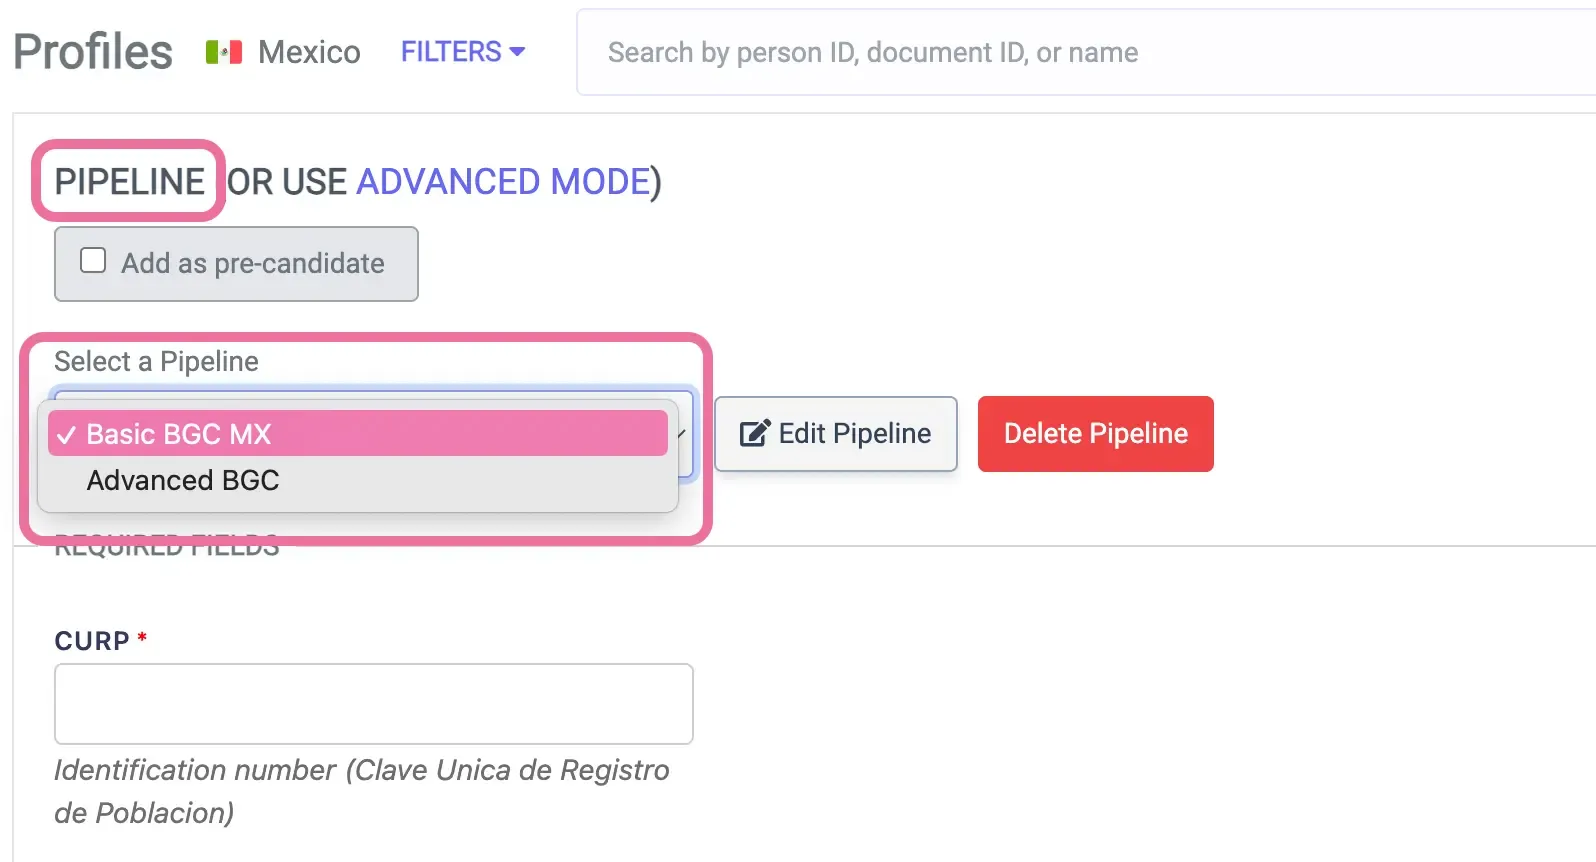
Section titled “Option B: 💡 Verification Pipelines”For a quicker selection, opt for our pre-designed pipelines, tailored to meet most common verification needs. Learn more about our verification pipelines.
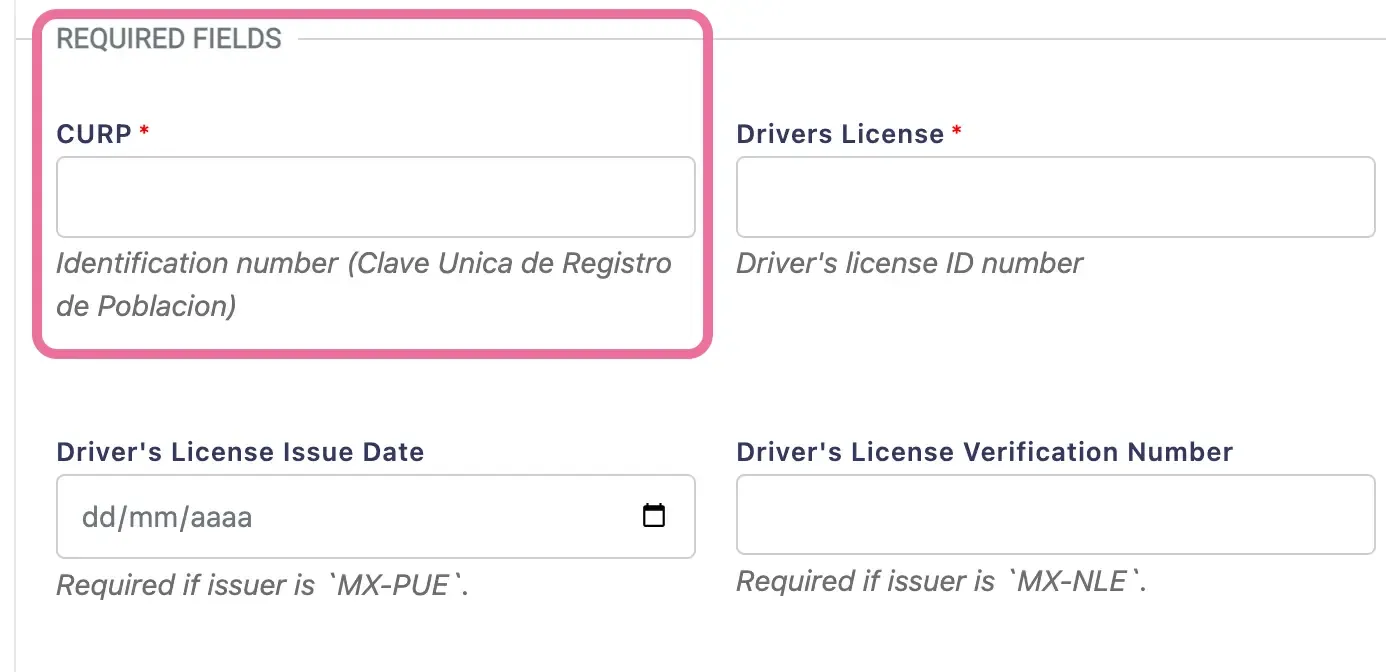
4️⃣ Fill in the required data ✍️
Section titled “4️⃣ Fill in the required data ✍️”Depending on your selected verification, specific data fields will appear. Ensure to provide all the necessary details. For instance, a criminal record check might ask for the document ID number.
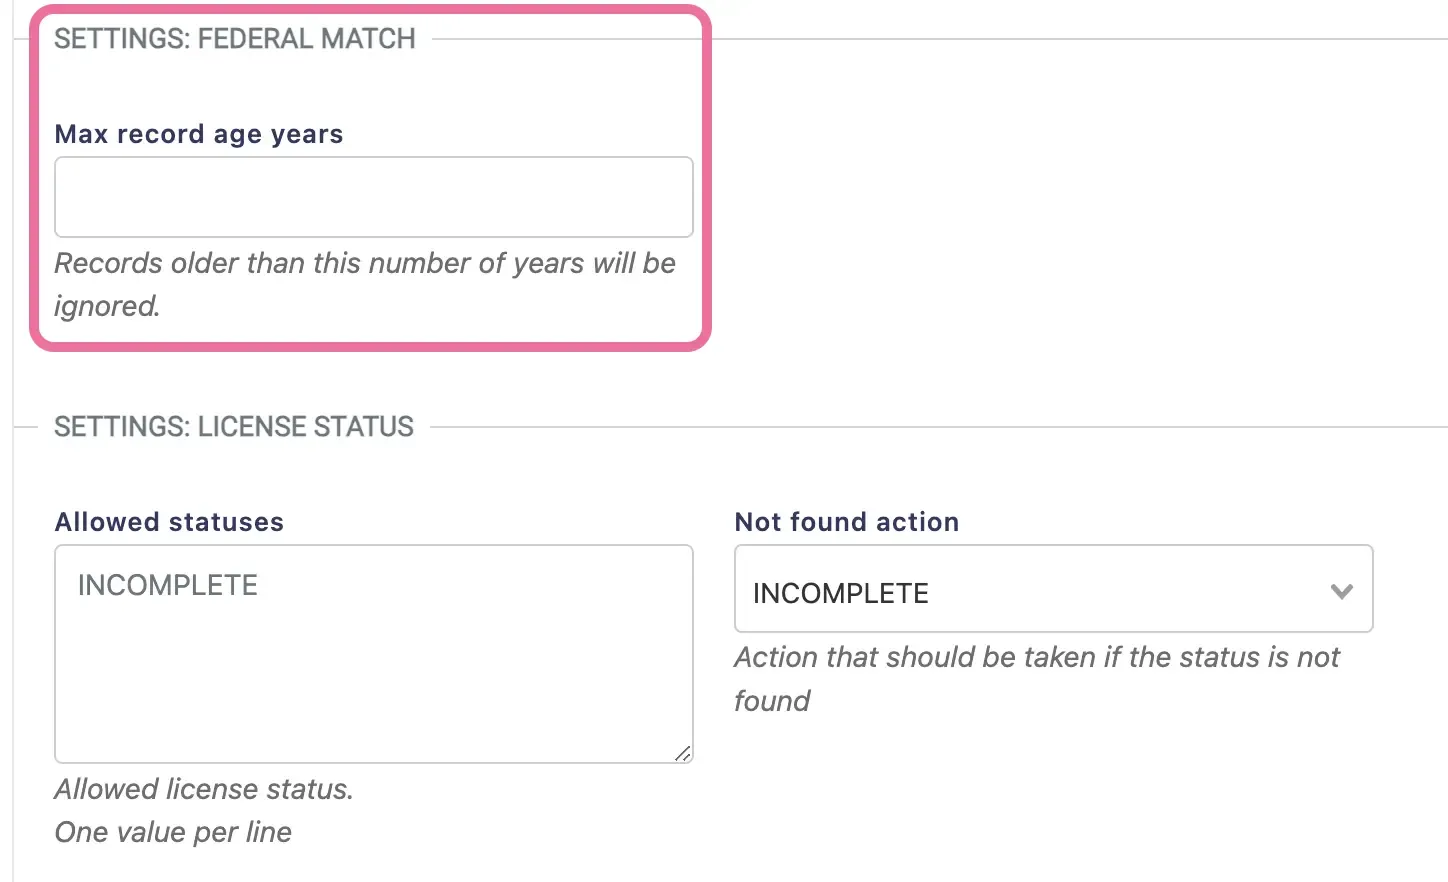
5️⃣ Adjust verification settings (if applicable)
Section titled “5️⃣ Adjust verification settings (if applicable)”Some reports, like criminal records, offer additional settings. For example, you can choose to ignore records older than a certain number of years. Adjust these settings according to your needs.
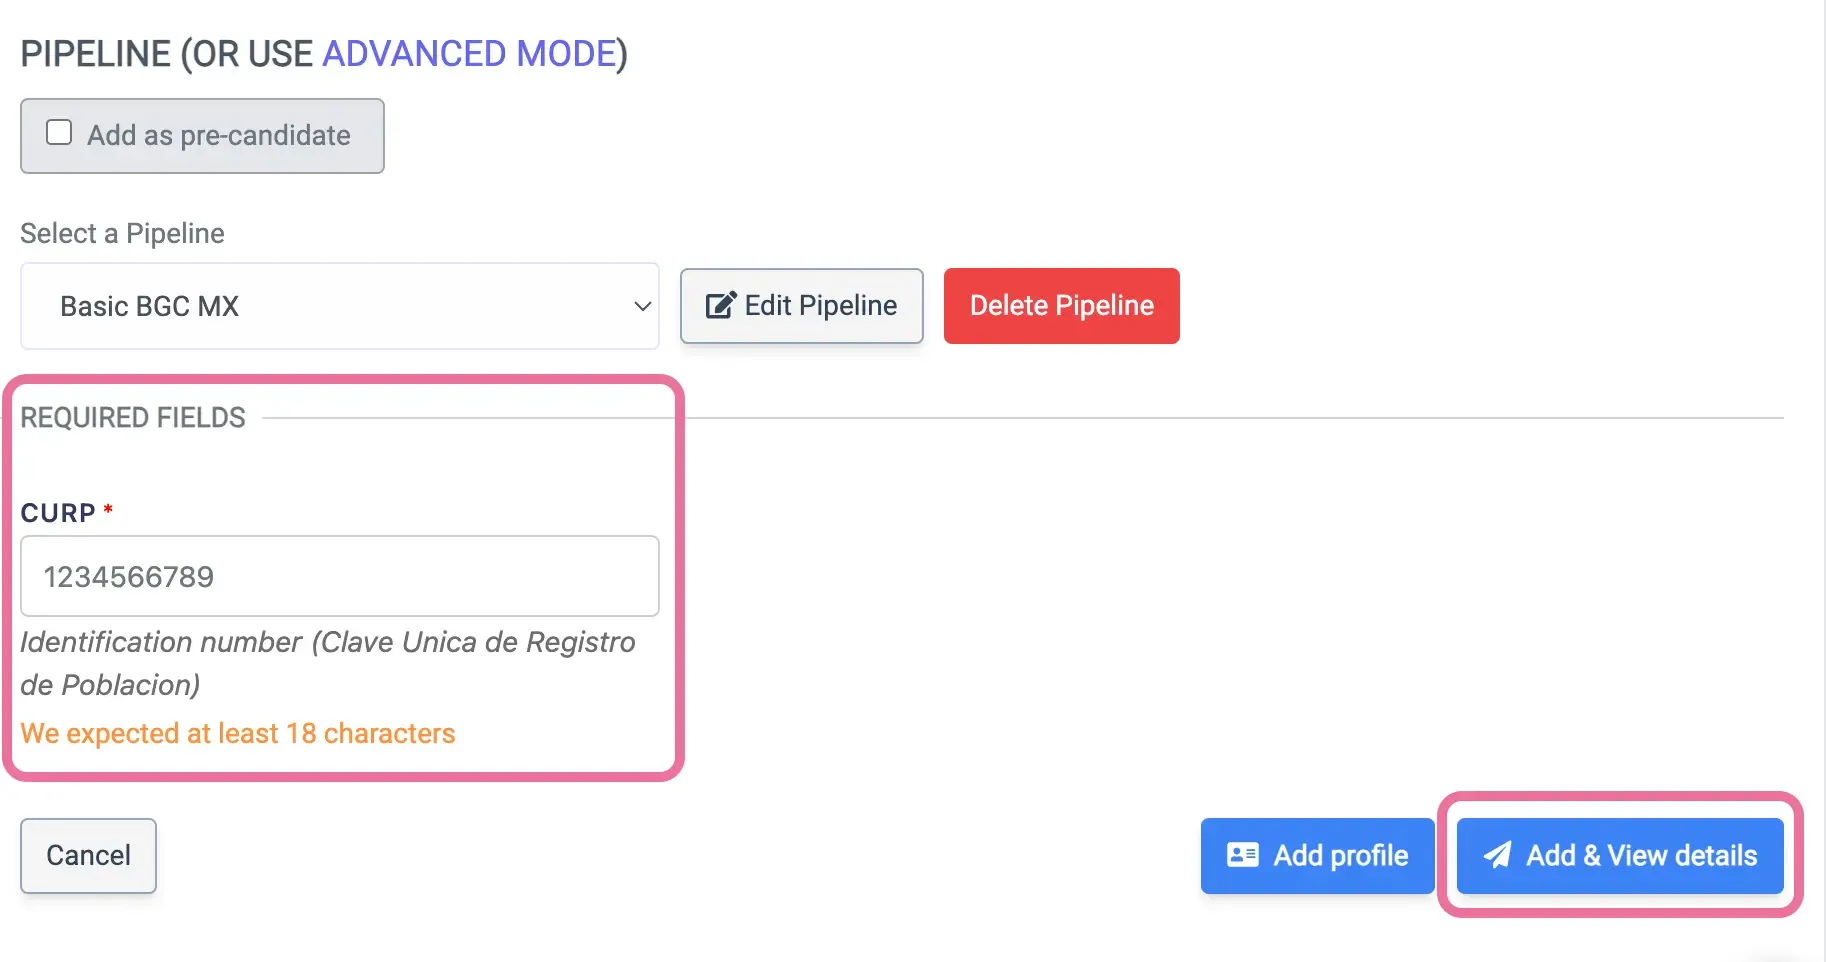
6️⃣ Review & Finish ✅
Section titled “6️⃣ Review & Finish ✅”Double-check all the data and settings to ensure everything is correct. If so, tap the ‘Add & View Details’ button to finalize the profile addition and immediately inspect the data.
Need Assistance?
Section titled “Need Assistance?”If any part of the process seems confusing or if you encounter any issues, just click on the chat icon 🗨 at the bottom right. Our team is here to assist!